Getting Started with myDegreePlanner 
myDegreePlanner
is the online application for running and viewing degree audits. It runs in
one of the supported browsers listed below without having to install additional
software on your device.
myDegreePlanner
is available via Windows and Mac computers running Internet Explorer (version 11
or later, Edge), Mozilla Firefox, Google Chrome, or Safari. Limited
functionality—running degree audits only—is also available via mobile devices running
Android (Chrome browser only) or iOS (Safari browser only).
This
guide assumes you are running myDegreePlanner on a Windows computer.
myDegreePlanner runs on Apple devices as well; however, the screen/icons might
be slightly different, in some circumstances, from what appears on this guide.
The
source for the student data used/displayed in myDegreePlanner is myZou.
Go
to https://mydegreeplanner.missouri.edu, or from within myZou,
navigate to Self
Service, then Student Center, and click on the Request Degree Audit link.
The
University of Missouri System application login screen will then appear.
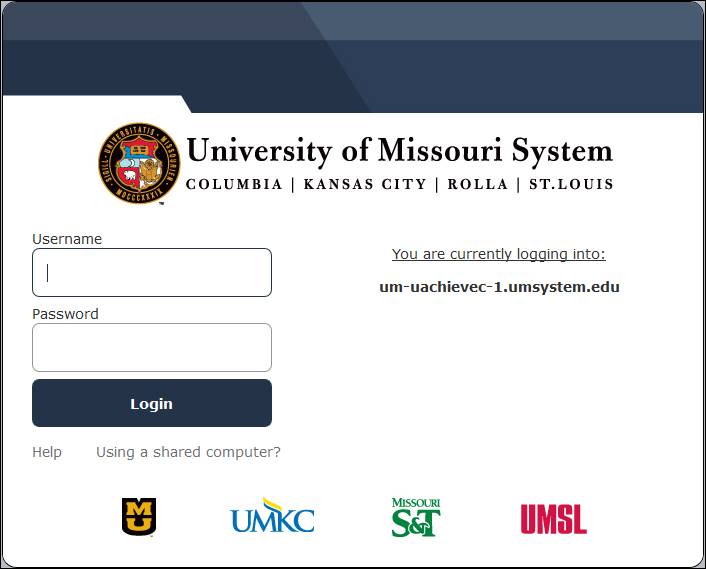
Enter
your username and password (the same credentials you use to log in to myZou),
and then click the Login button.
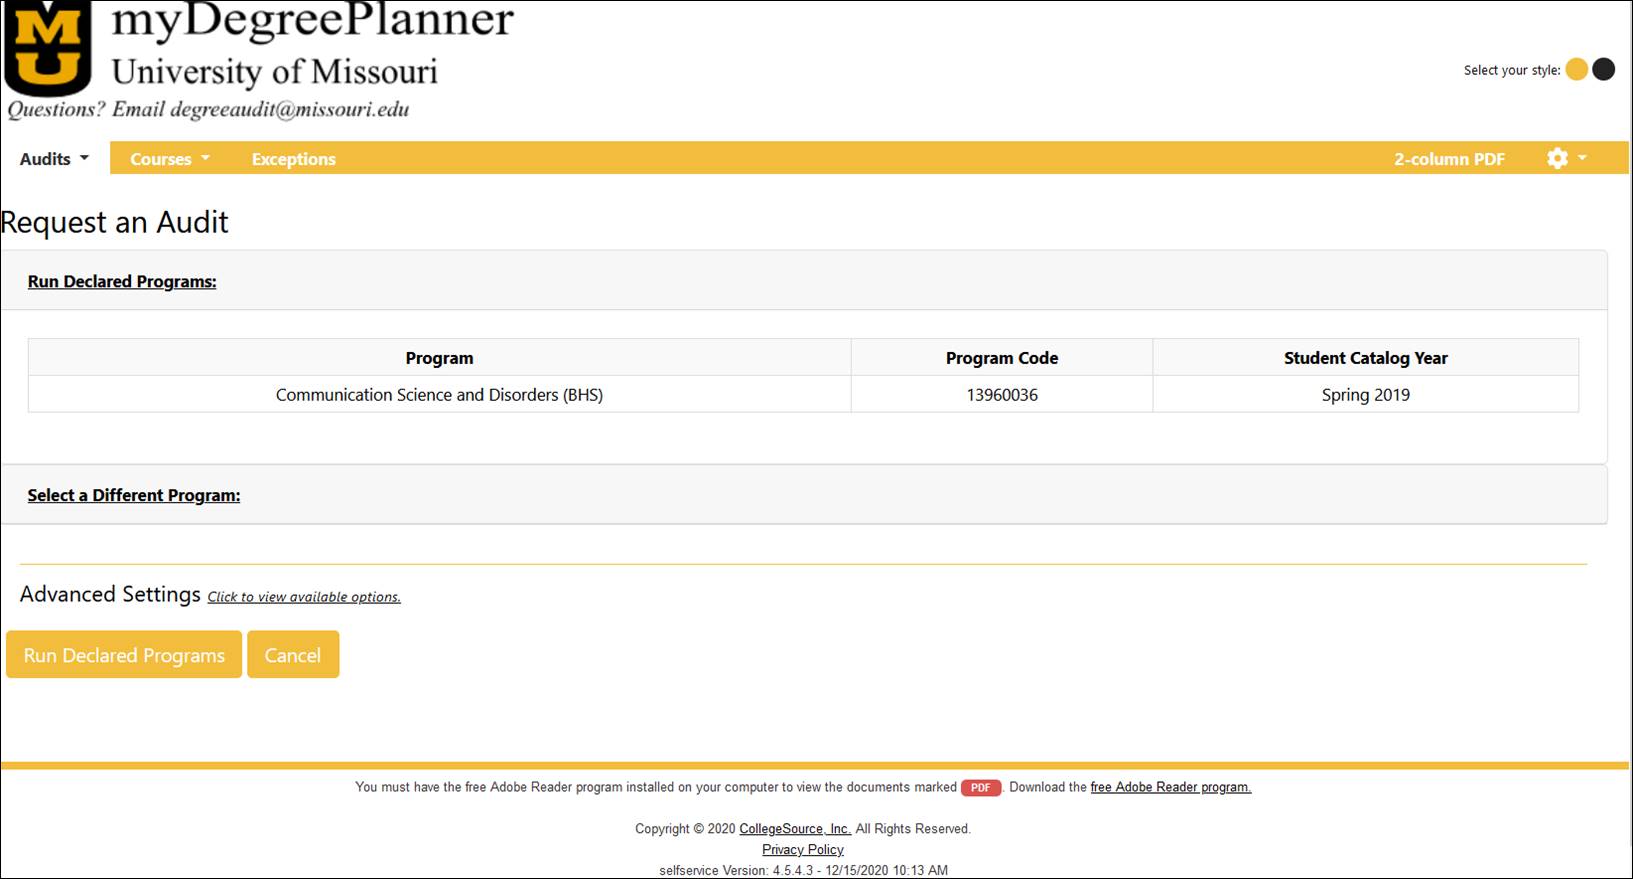
Once
you log in, the Request an Audit screen displays.
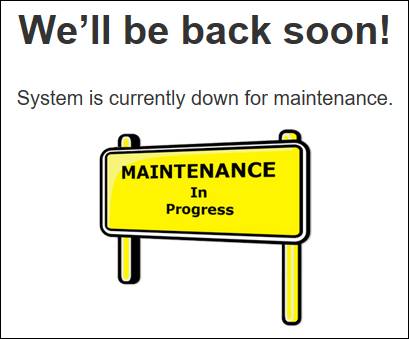
If
the Maintenance In Progress page displays instead, it means that the
system is undergoing regularly scheduled maintenance. Please try to log in
later.
If
some other error message displays, or the program becomes unresponsive, you should
report the issue to degreeaudit@missouri.edu.
Use
the myDegreePlanner menu items/icons/links that appear in the browser’s main
screen to navigate the application. Do not use the browser’s menu
items/buttons that appear in the browser’s header—such as the Back
button—as this can cause problems.
You
can change the application’s color via the Select your style toggle buttons
that appear at the top right of the screen. The two choices are gold and
black.
Contextual
help is available on some screens via the question mark icon and as a menu option
item via the Settings icon
and as a menu option
item via the Settings icon  .
.
Always
log out of the application when no longer using it. To do so, click on the
Settings icon , select the Log Out option, and then follow the on-screen
instructions.
Request an Audit 
The
Request an Audit screen has three main sections: One to request an audit
for your program of study/catalog year as defined in myZou (Run Declared
Programs), one to request an audit for a different program/catalog year (Select
a Different Program), and a section with several fields to configure your
request by changing the default settings (Advanced Settings).
The
program(s) of study associated with your records in myZou, for which a degree
audit exists, display by default.
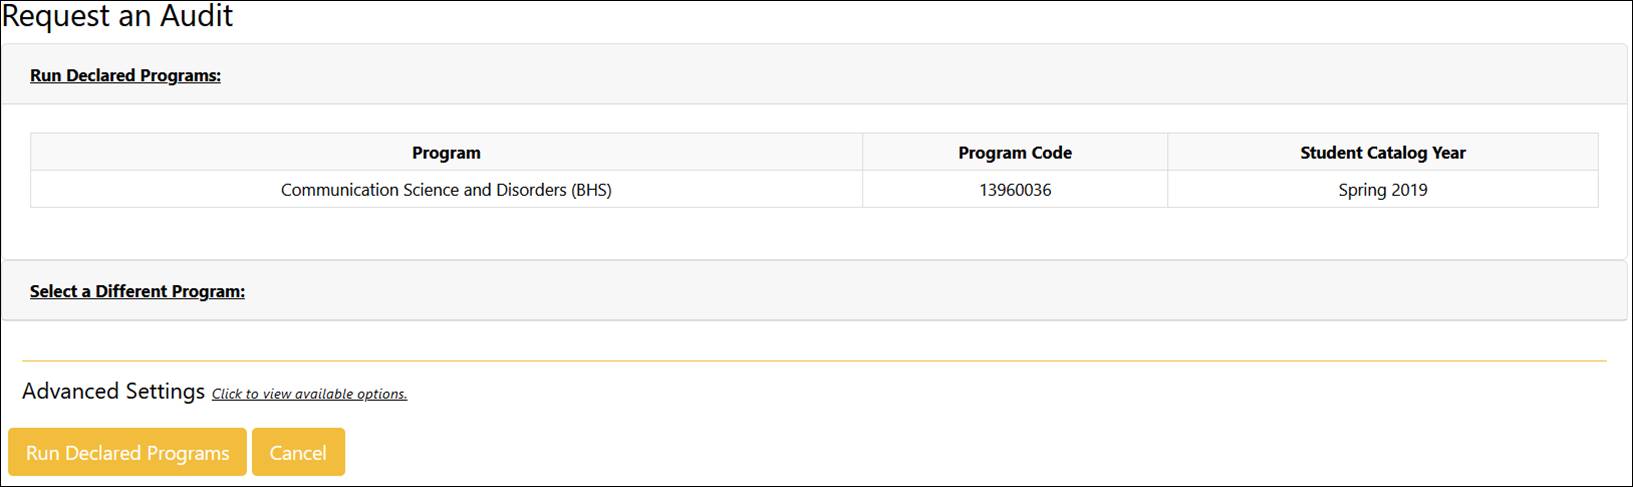
Click
on the Run Declared Programs button to run an audit for the listed
program(s).
Wait
until the Completed Audit Requests screen stops updating. Don’t click
on any of the stop/pause options that might display.
The
report(s) for the audit(s) will be added to the list of existing reports (if
any).
The
Request an Audit screen displays this message if no degree audit matches
your program of study:

If
this happens, you can select a different program. You should also select a
different program if you have multiple programs of study and you wish to run an
audit for a single program, or, if you wish to run an audit for a
program/catalog year other than the default one(s).
To
do so, click the Select a Different Program link.
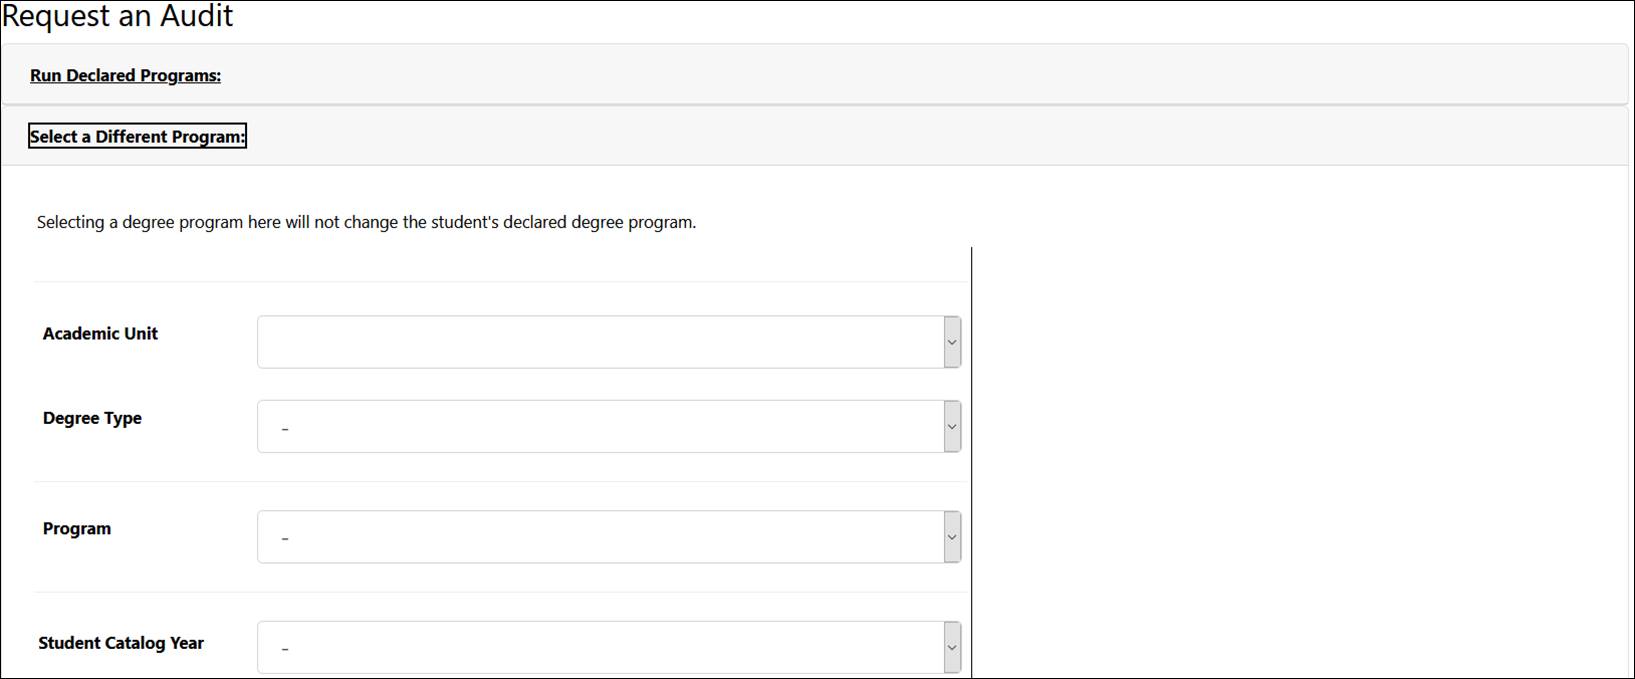
Select
the Academic Unit of the program, then select the Degree Type
(Bachelor, Master, etc.), Program, and Student Catalog Year. If
you are unsure in which academic unit the program is, set the Academic Unit
field to blank, and a full listing of all programs will be available via the Program
drop-down.
Click
on the Run Different Program button to run an audit for the selected
program/catalog year.
The
audit report will automatically open once the audit finishes processing.
Please
Note: If you have multiple programs of study in myZou, and degree audits are
available for only some of them, a message like this displays:
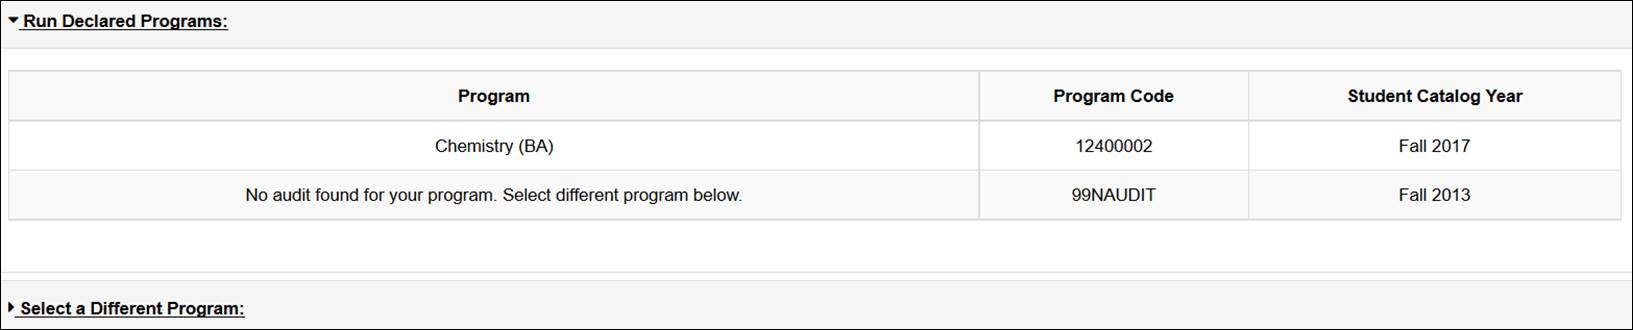
If
this happens, you can run an audit for the listed program(s) by clicking on the
Run Declared Programs button (however, additionally, a default blank
audit report will be generated for each row displaying the “No audit found for
your program. Select different program below.” message) or select a single
program by clicking on the Select a Different Program link.
The
Advanced Settings section of the screen includes four fields that allow
you to set options for each audit by changing the default settings.
To
display the fields, click on the Click to view available
options.
link
that appears to the right of the Advanced Settings section header.
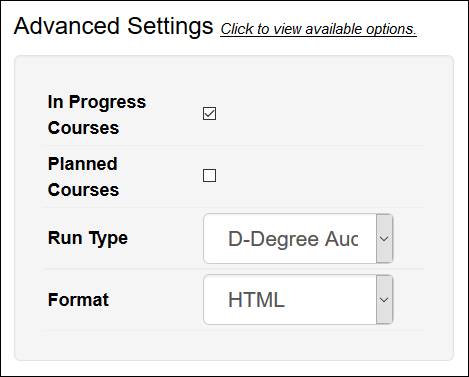
The
In Progress Courses checkbox determines whether in-progress (IP) courses
will be included in the audit. This option defaults to checked; IP courses
will be included unless you uncheck the box.
The
Planned Courses checkbox determines whether your planned courses will be
included in the audit. This option defaults to unchecked; planned courses will
not be included unless you check the box.
Currently,
the Run Type drop-down selection has a single option; it is set by
default.
The Format drop-down
allows you to choose the audit report format. Options are:
HTML: The default and recommended format.
PDF (single column): This format generates a PDF version of the HTML audit.
Note:
The advanced settings apply to audits run under either the Run Declared
Programs or the Select a Different Program sections above. They
do not “stick” from run to run, but instead reset to the default settings after
each audit request completes so that the next audit request does not execute
with unintended settings.
View the Audit Report 
Reports
from previously ran audits (by you or shared by an advisor) display in the Completed
Audit Requests screen. The reports can be in HTML or PDF format.

The
Completed Audit Requests screen opens automatically after a default
program audit finishes running. To access the Completed Audit Requests screen
without running an audit, click on the Manage option of the Audits
menu item on the menu bar.
The
screen displays a grid. The grid has one row per audit report and, within that
row, the following fields:
Program: The program of study
used in the degree audit.
Catalog
Year:
The catalog year used in the degree audit.
Type: The  icon displays if the
audit report is generated via the Select a Different Program option.
icon displays if the
audit report is generated via the Select a Different Program option.
Includes IP/Planned Courses: The  icon displays if the
audit includes in-progress coursework. The
icon displays if the
audit includes in-progress coursework. The  icon displays if
planned courses are included (planned courses may also include in-progress
courses).
icon displays if
planned courses are included (planned courses may also include in-progress
courses).
Format: The  icon displays if the report is in HTML format. The
  icon displays if the
report is in single-column PDF format.
icon displays if the
report is in single-column PDF format.
The
Prepared By and Prepared On fields display information about who
created the report and when.
The
last column on the grid allows selection of reports for deletion. Once
selected, the report(s) can be deleted by clicking on the Delete
button. Below the Delete button, the Select All/None link allows
selection/deselection of all reports at once.
By
default, the most recent degree audit report displays at the top, with the rest
displaying in descending order of preparation. You can change the sort order
by clicking on any of the hyperlinked column headings.
To
open one of the listed reports in the viewing screen, click on the hyperlinked
program title in the Program field (first column).
The
report-viewing screen includes a header, and below it four tabs: Audit
Results, Course History, Exceptions, and Markers.
Screen Header
The
header includes data about you, the audit’s program of study, and the audit
itself, including a unique job ID. You should always provide the value in the Job
ID field when reporting a problem/concern about a specific audit report.
It
also includes a shortcut Request Audit button; clicking on it returns
you to the Request an Audit screen.
This
tab displays the audit report, in either HTML (default) or PDF format.
The
reports are static, as they do not refresh each time you view them. They are
available for viewing for seven days only. To access a current report, request
a new audit, which will generate a new report.
The
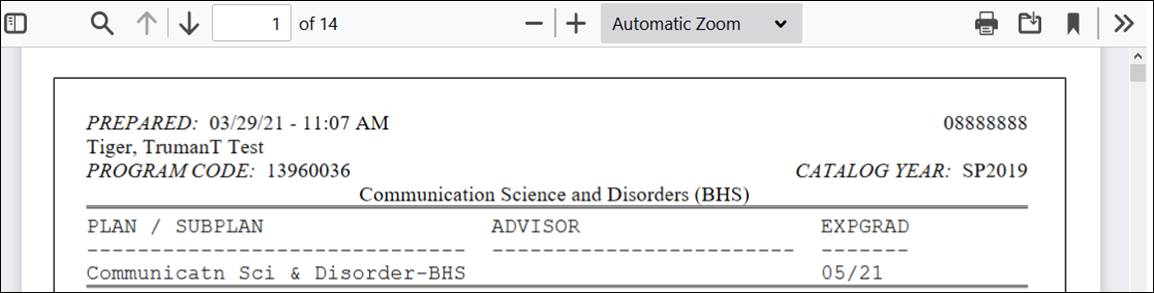
reports have three sections: a header, the body/main section, and a footer.
Report
Header
The header displays information about your program(s) of study (majors, minors,
certificates, emphases) with an active status in myZou, the associated advisor(s),
and expected graduation date(s).

The
information for a program of study (including advisor information) stops displaying
once you complete it.
It
is then replaced with information concerning the completed program of study. This
includes certificates, minors, emphases, and degrees earned at Mizzou.
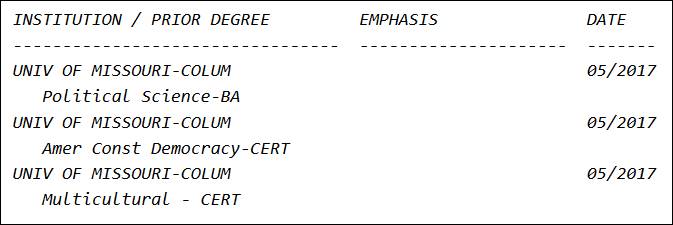
Degrees
earned elsewhere also display, if recorded in myZou.
Below
this section, a summary line reports whether all of the program of study
requirements included in the audit have been met.


Most
reports begin with text outlining introductory information or general
requirements, then list program of study specific requirements, both required
(numbered) and optional (not numbered).
The
HTML report main section is described in detail below, in the Navigating the
HMTL Audit Report section.
The
single-column PDF report displays in a container window:
If
the window does not open by default, you need to configure your browser via the
browser’s applications options (set the PDF-documents viewer to “preview in
browser” or similar option).
The
window includes various browser-dependent options to view, navigate, print, and
download the report. It displays only a small portion of the report at the
time; it is not designed for use as the primary report-viewing tool. Once you
are satisfied that you are looking at the correct report, you should download
it and view it in your regular PDF document viewer.
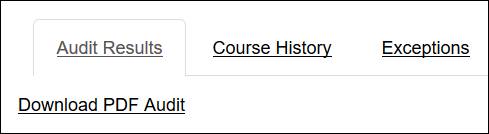
You
may also download the single-column PDF report via the Download PDF Audit
link that appears
immediately below the Audit Results tab label.
The
report footer includes five sections:
1) Signature lines
2) GPA descriptions
3) Information about the
PDF reports’ codes, course codes, and special grades.
4) A brief description of exceptions
that applied to that specific degree audit, if any.
5) A FERPA confidentiality
warning.
HTML
reports initially display compressed, with only requirement headers showing.
Additionally, several informational and navigation items display to the left of
each requirement.
Opening and Closing Requirement Sections
Use the Open
all Sections or Close All Sections links or icons (
 ) above the report
header to open (display details) or close (hide details) all requirement
sections at once.
) above the report
header to open (display details) or close (hide details) all requirement
sections at once.
Sections
that are closed display with a right-pointing icon next to them . Sections that are
open display a down-pointing icon
. Sections that are
open display a down-pointing icon  . Clicking on these icons opens/closes one
section at the time.
. Clicking on these icons opens/closes one
section at the time.
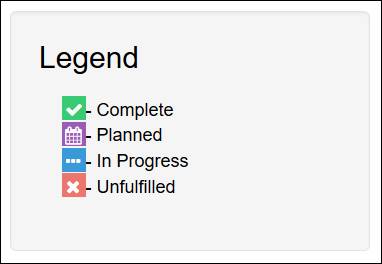
Key/Legend
An
abbreviated key/legend of the informational icons that appear to the left of
each requirement/subrequirement displays at the bottom of the HTML report.
Additionally,
clicking on the question mark icon  opens the full key for the HTML report,
describing icons, course codes and special grades.
opens the full key for the HTML report,
describing icons, course codes and special grades.

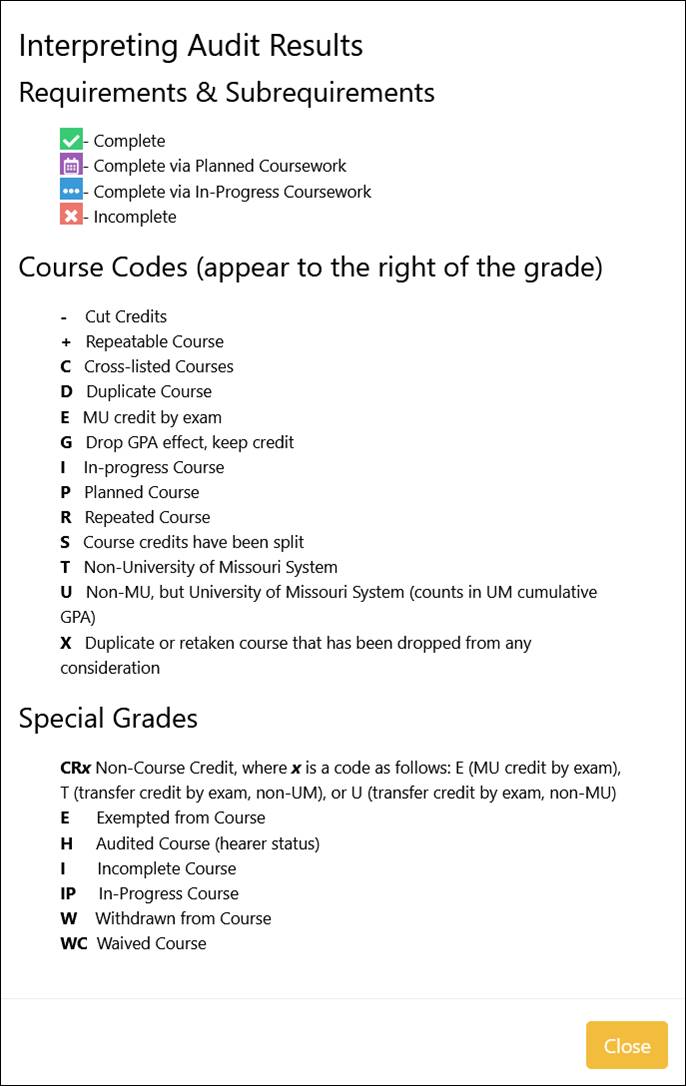
To
close the key screen, click the Close button.
Printer Friendly
On the far-right side of the Audit Results display is a link to a “printer
friendly” version of the HTML report:
Clicking
on this link opens a new browser tab displaying the HTML report by itself. To
print it, use the browser’s printing functionality.
Close
or switch tabs to return to the Audit Results window.
Requirements/Subrequirements
Completion
of a program of study requires a number of undertakings, for example, taking
specific courses, obtaining minimum grades, attaining specific grade point
averages, etc. These are known as requirements. Complex requirements can be
better understood by splitting them into subrequirements.
The
report body includes information about required, optional, and informational
requirements, and each requirement’s subrequirement(s) (if any).
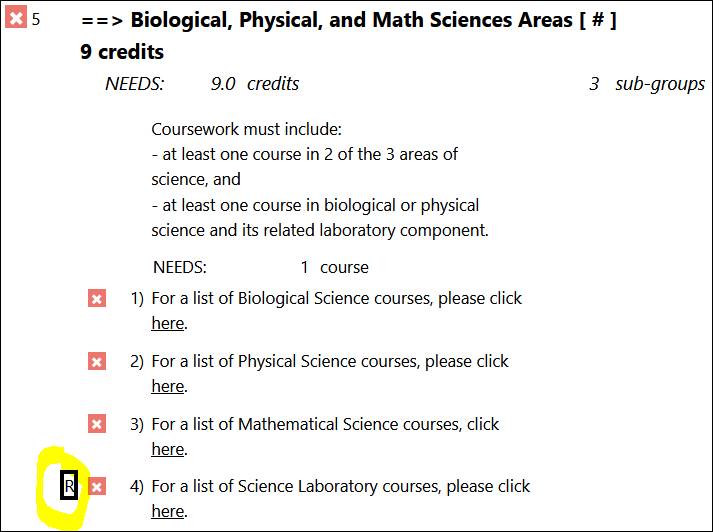
Requirements
Typically,
requirements include:
- a requirement number,
- a title,
- a summary line
indicating the number of credits or subrequirements (referred as sub-groups)
needed/earned to complete the requirement, and
- subrequirements.
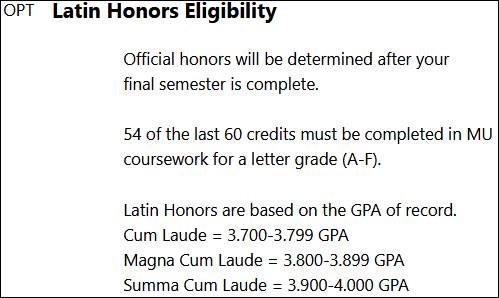
Optional
requirements do not include a requirement number; OPT appears instead.
Informational
“requirements” are also unnumbered, and typically contain no subrequirements;
they may contain instructions, descriptions, examples, or serve as section
separators. For example, the signature lines.
Subrequirements
Typically
include:
- a subrequirement
number,
- a title,
- a summary line
indicating the number of credits or courses/set of courses that are needed/earned
to complete the subrequirement, and
- lists of courses that you
o
have
taken,
o
can
take (SELECT FROM), or
o
can’t
take (NOT FROM)
to fulfill the subrequirement.
It
may include an icon saying that the subrequirement is required  and not just an option
from the set of listed subrequirements.
and not just an option
from the set of listed subrequirements.
Informational
subrequirements do not count towards the number of subrequirements needed to
fulfill a requirement; rather, they provide information only. For example, the
Latin Honors subrequirement may inform an undergraduate student concerning
honors eligibility in a specific academic unit based on current cumulative grade
point average.
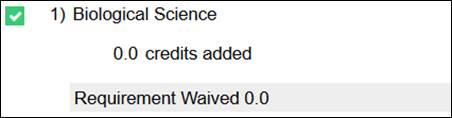
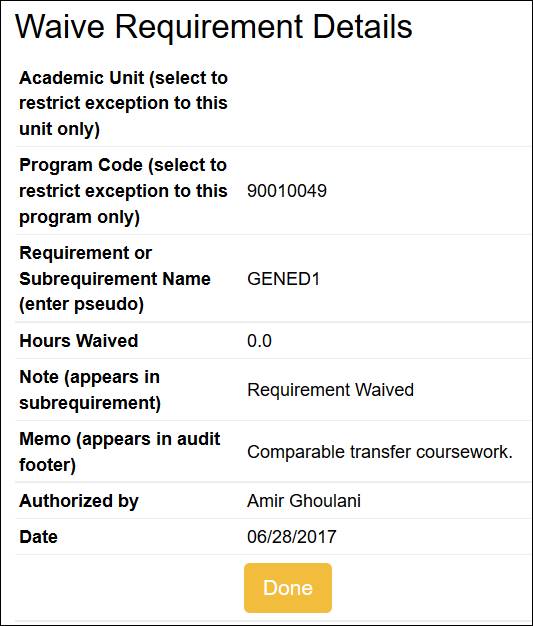
A
“Requirement Waived” notation appears if the subrequirement has been waived.
Courses
included in SELECT FROM and NOT FROM lists are hyperlinked.
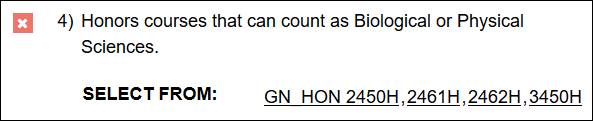
Clicking
on a hyperlinked course opens a pop-up screen displaying course information, if
there is an exact match to a course in the current myZou catalog.
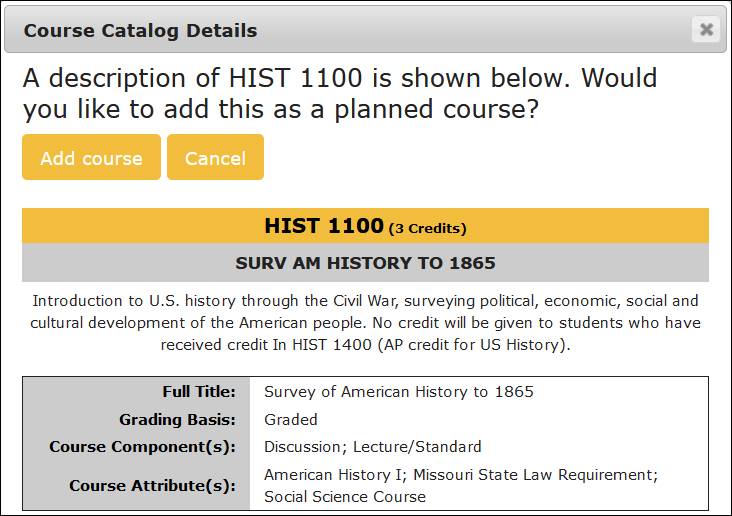
You
can add the course to your planned courses list by clicking on the Add course
button. To close the screen, click the Cancel button.
Course History Tab
This tab displays coursework information, up to 32 terms, both on-campus and
transferred-in, as recorded in myZou. Planned courses appear if such courses
were included in the audit request that generated the report you are viewing.
You
can change the sort order by clicking on the hyperlinked column headers. You
can also filter the list by selecting values for the Grade and/or Term
drop-downs, and then clicking the yellow arrow icon  . To return to the full
list, select the default Grade and Term values in the respective drop-downs,
and then click on .
. To return to the full
list, select the default Grade and Term values in the respective drop-downs,
and then click on .
This
screen does not display the equivalent of a university transcript. Do not use
it as a transcript.
Exceptions Tab
An exception is a modification to the standard program of study completion
requirements. For example, under certain circumstances, a required course may
be waived because you took a similar course.
This
tab lists only exceptions that could apply to the current audit, which might be
a subset of all exceptions on your record. The full list of exceptions on your
record is available via the Exceptions screen (see the Exceptions Screen
section below).
Please
contact your advisor if you have questions about an exception.
Markers Tab
Markers are sets of requirements that can be included in addition to or instead
of the regular set of requirements.
For
example: Some programs of study offer the option of selecting specialization “tracks”;
advisors can add such tracks to your degree audit via markers so that you can
see what coursework you must complete.

Please
contact your advisor if you have questions about a marker.
While viewing an HTML or PDF formatted report,
you may access a condensed, 2-column, PDF version of the report, by clicking on
the 2-column PDF menu item on the gold menu bar. This option is only
available when viewing an HTML or PDF formatted report (it doesn’t work when
you are on other screens, as it needs to know which report to display in the
2-colum format).
Planned Courses Screen

To
access the Planned Courses screen, select the Courses item from
the menu bar, and then the Planned option.
The
planned courses screen allows you to add courses to an audit to simulate their
effect on program of study completion. Planned courses are NOT automatically added
to your official enrollment records in myZou.
Courses
listed in the Planned Courses screen appear on an audit report/courses
tab if you requested the audit to include them. Inclusion of planned courses
in the audit is not the default option.
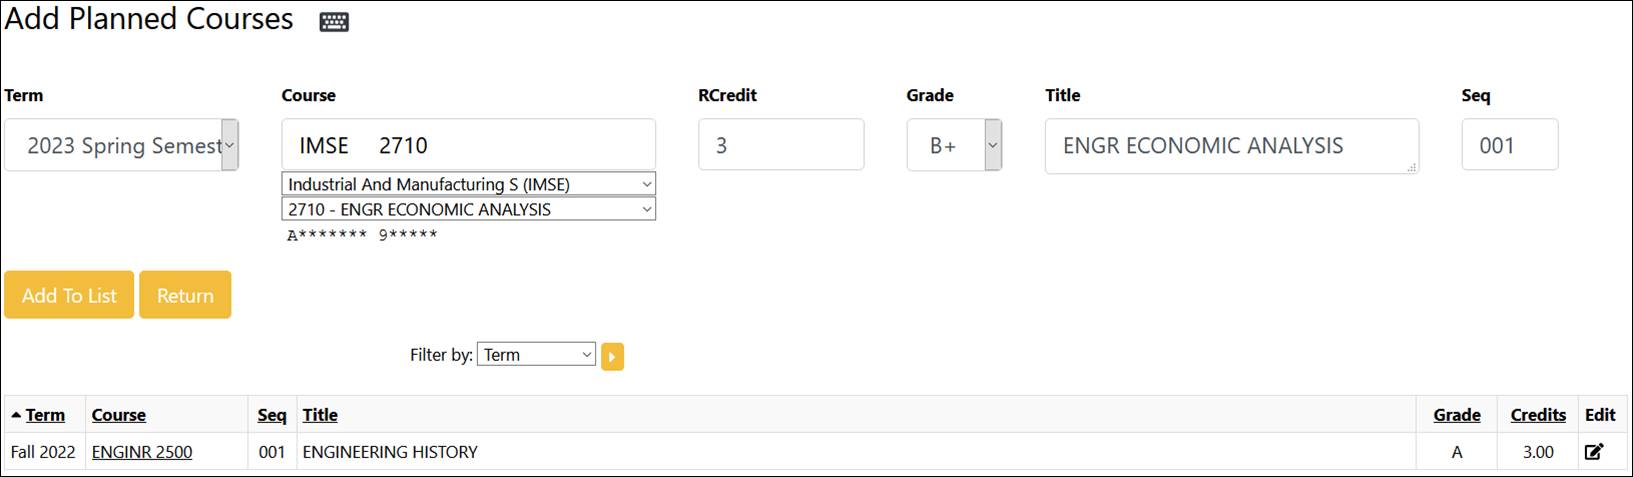
Adding
a Planned Course
·
Click
the Add Planned Course button to display the Add Planned Courses
screen:
·
Select
a Term for the course.
·
Select
the Course subject code (for example, MATH) and course number (for
example, 1500) using the drop-down lists of values located under the Course
field. The Title will automatically populate once the course number is
selected.
You should not type in the subject and course number information
directly into the Course field, as it is easy to make a mistake. If you
choose to type in the course information, separate the subject code and the course
number with a back slash only (for example, MATH\1500). This will ensure the
two are spaced correctly.
This is a required field.
·
Enter
the credit hours in the RCredit field.
This is a required field.
·
Enter
the expected grade in the Grade field.
If the planned courses are expected to be completed elsewhere, select grades
ending in T (transfer) or U (transfer from UM-System school) respectively.
This is a required field.
·
Ensure
the three required fields above have values, and then click on the Add To
List button to save the planned course. If all required fields are not
present, an error message will display and all data for the course will be
discarded.
·
You
may enter a single course or multiple courses. If entering many courses, click
on the  icon to display a list of short-cut keys for faster entry.
·
Click
the Return button when done entering courses.
Exceptions Screen
The Exceptions screen displays select
information about all existing exceptions on your record.

Please
contact your advisor if you have questions about an exception.
Clicking on an exception’s hyperlinked Code
value displays all the available information for that exception.
Click on the Done button of the Details
screen to return to the Exceptions screen.
Settings Menu 

The
Settings menu item in the gold menu bar provides access to the Help and Log
Out options.
Help
Clicking on the Help link opens this document online.
Log
Out
To log out of myDegreePlanner, select the Log Out option from the Settings
menu, and follow the onscreen instructions.